Showing posts with label Bread. Show all posts

Wednesday, June 8, 2011

You Never Know Until You Ask

I've been wanting a bread machine for ages. I love homemade bread as much as I love chocolate (and that's a lot), but I often don't have time to make it anymore. Plus in the summer I hate to turn on the oven.When it's approaching the triple digits outside, who wants an additional heat source in the house?

So I decided that I had a few bucks to spend on a used one. Instead of actually getting in the car and going to a garage sale or thrift shop like a normal person, I just posted on Facebook that I was interested in buying a bread machine. I kid you not, within 5 minutes I had two friends offering to give me one! For FREE!  That's my kind of deal. I picked up the first one offered later that day and I've already used up an entire bag of bread flour.


Yesterday I decided to venture into new bread machine territory and make homemade bagels. They have to be shaped, boiled and baked by hand, but the bread machine makes them so easy! They take a lot of time for the rising, etc., but not a lot of effort. Now that my family knows I can make bagels at home, I'm sure the bread machine will be working overtime.


If you're interested you can find the recipe here.

Friday, June 25, 2010

HomemadeTortillas


My family loves homemade flour tortillas. They taste so much better than the kind you buy at the grocery store and they're a quick and frugal addition to almost any meal. Today we had soft tacos.

Here's my secret recipe...

Tasty and delicious every time although not always perfectly round. :)

Tuesday, March 24, 2009

Homemade Bread 101

Photobucket
If you've been reading here for long you know that I love to bake, especially bread. There's just something special about a kitchen that smells of a warm loaf fresh from the oven that makes it a wonderful place to be.

Some of you have asked for tips on bread baking so I thought I would show you how to make a really simple loaf of white bread. I'm not an expert by any means but I've learned a few things over the years, mostly by trial and error (heavy on the error part). Even if you've never baked bread before you can do this.

This recipe makes one loaf. I like to make one loaf at a time (unless we are having company) because I think it tastes better when it was made the day we eat it, plus the kneading time is shorter when you are only making one loaf. Since I like to bake I don't mind making bread multiple times in a week. This recipe can be doubled if you want two loaves just remember to knead about twice as long.

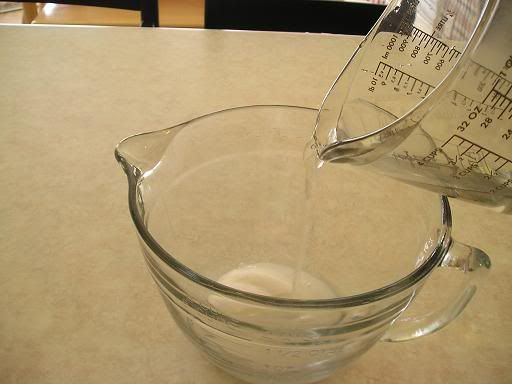
First dissolve 1/3 cup sugar in one cup warm water. The temperature should be about 110 degrees. If you don't have a thermometer just make sure it's warm to your fingertips without being hot.
Photobucket

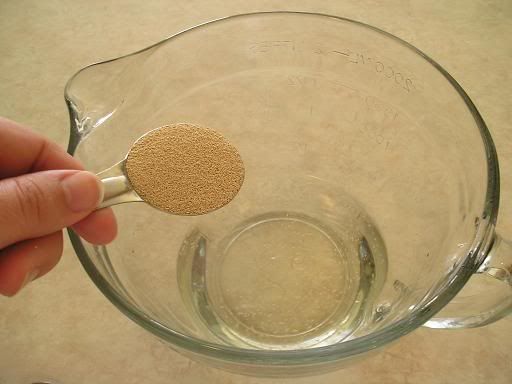
Next stir in one Tablespoon of active dry yeast (or one packet).
Photobucket

Allow the yeast to "proof". Let it sit until it looks sort of foamy and creamy.
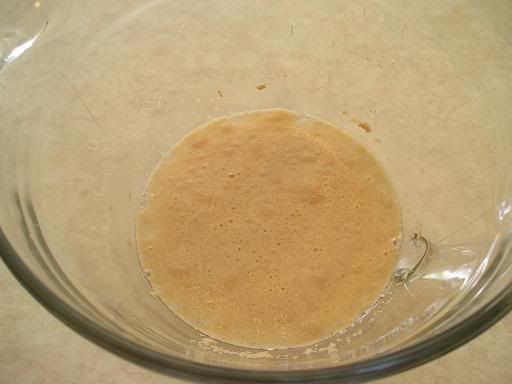
Photobucket

Stir in 3/4 teaspoon salt and 2 Tablespoons vegetable oil.
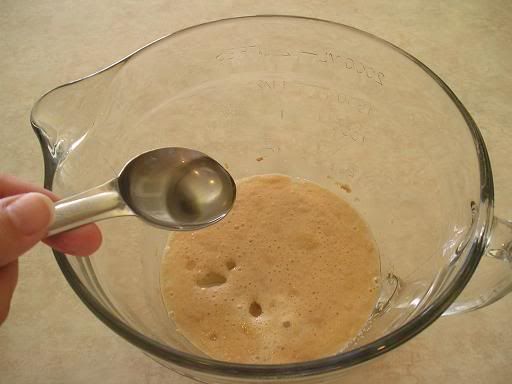
Photobucket

Mix in 3 cups flour one cup at a time.
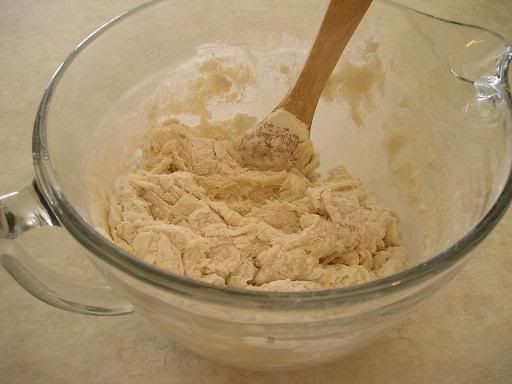
Photobucket
When you are following a bread recipe remember that the amount of flour called for isn't exact. It depends on the humidity where you live, your elevation, etc. Start with a smaller amount of flour and gradually work your way up. You might start with 2 1/2 cups and see how that works.

Just mixed dough will be sticky, but pick it up and feel it. Does it feel too soft or too stiff? If it's too soft, add more flour 1/4 cup at a time. If it's too stiff sprinkle with 2 tablespoons of water and mix again. If it is hard to press with your fingers it's too stiff. It shouldn't feel like clay. You don't want to pull a brick out of the oven.

Turn the dough out onto a lightly floured surface (I just use my countertop) and knead.
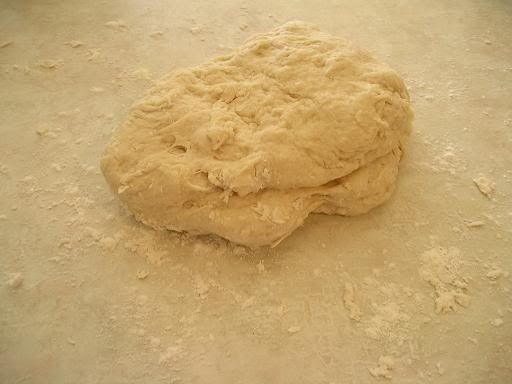
Photobucket
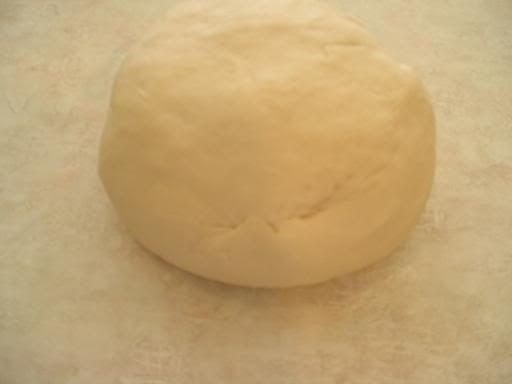
Kneading makes the dough able to rise. If you are kneading a single loaf it will probably take about 10 or 15 minutes. It's a good workout for your arms, right? I use the heels of my hands and push down on the dough with my whole body, then lift, turn and repeat. Keep it pretty much in a ball and get into a rhythm with it. Fill that dough full of love for your family. Continue kneading until the dough is smooth and elastic.

Notice the difference in texture from the way it looked when I first turned it out of the bowl.
Photobucket

Now place the dough in a well oiled bowl and turn it to coat.
Photobucket

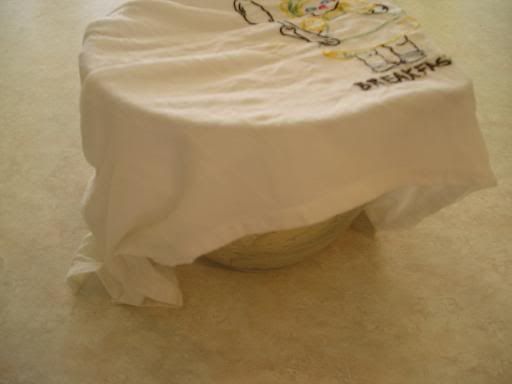
Cover with a damp cloth.
Photobucket

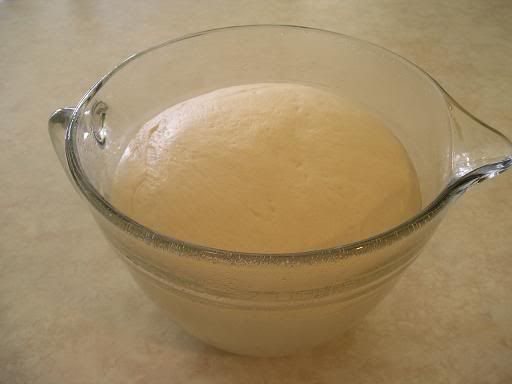
Now go fold a load of laundry, vacuum the living room and check your email while you wait for it to rise until doubled, but don't go too far. It will take about an hour.
Photobucket

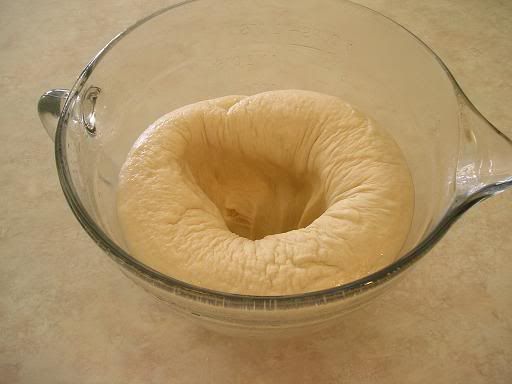
Punch the dough down and knead for a minute or two.
Photobucket

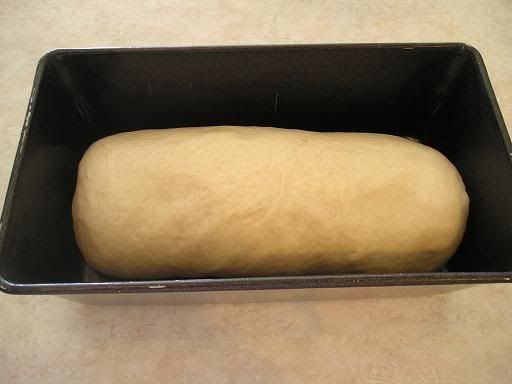
Shape the loaf and place into an oiled pan. There are many ways to shape a loaf. An easy one is to roll the dough into a rectangle and roll up like a jelly roll then press the seam to seal and press the ends down to seal. Just make sure there are no air pockets. It doesn't matter if it looks funny. it will still taste good.
Photobucket
Cover and let rise again until double. This will take about half the time of the first rise.

If for some reason you need to leave while your dough is rising, you can place it in the fridge. It will slow the rise down, but it won't keep indefinitely that way so don't be gone too long.
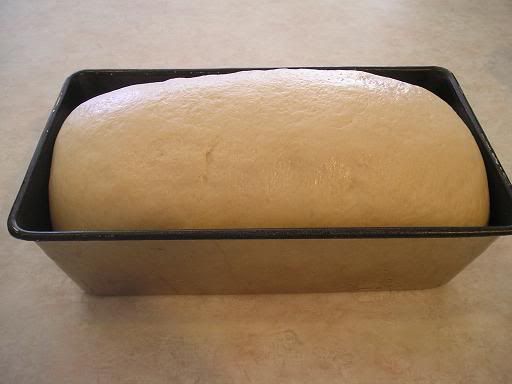
Photobucket
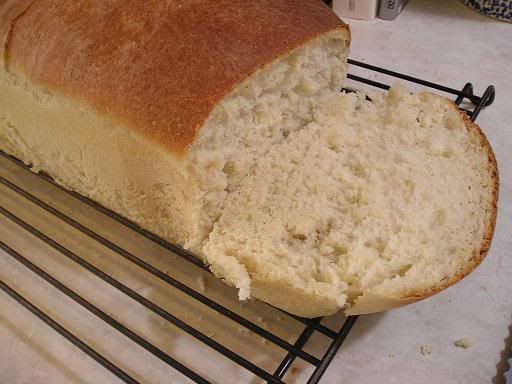
Place the risen loaf very gently in a pre-heated 350 degree oven and bake for about 30 minutes. How do you tell if it's done? Does it have a pretty golden color? Does it slide out of the pan easily? If you tap it does it sound hollow rather than thick? If so then it is ready!

If you are like us, you'll want to slice into it right away. Use a sharp thin bread knife and saw back and froth gently rather than pressing downward or you'll just make it into a flattened mess (although it will still taste good). It can be cut more easily after it cools.

By the way, my loaf in the picture at the top of this post could have stood another 5 minutes or so in the oven, but by the time I decided it needed to bake a little longer the kids were already digging in so I figured why bother. :)

Cool on a wire rack.

Amish White Bread

* 1 cup warm water (110 degrees F/45 degrees C)
* 1/3 cup white sugar
* 1 packet active dry yeast or 1 Tablespoon
* 3/4 teaspoon salt
* 2 tablespoons vegetable oil
* 3 cups bread flour

1. In a large bowl, dissolve the sugar in warm water, and then stir in yeast. Allow to proof until yeast resembles a creamy foam.
2. Mix salt and oil into the yeast. Mix in flour one cup at a time. Knead dough on a lightly floured surface until smooth. Place in a well oiled bowl, and turn dough to coat. Cover with a damp cloth. Allow to rise until doubled in bulk, about 1 hour.
3. Punch dough down. Knead for a few minutes. Shape into loaf, and place into well oiled 9x5 inch loaf pan. Allow to rise for 30 minutes, or until dough has risen 1 inch above pans.
4. Bake at 350 degrees F (175 degrees C) for 30 minutes

Wednesday, November 19, 2008

Buttermilk Bread

If you've been reading here for long, you know that I love to make bread! There is just something so satisfying about it. The smell of fresh bread makes the whole atmosphere in my house cozy and welcoming. Mike even commented the other day that he lives in a bakery! :)

This bread is one of my favorites. The wheat germ gives it extra nutrition and the honey makes it a beautiful color.

2 Tablespoons dry yeast
3/4 cup warm water (110 to 115 degrees)
3 cups warm 1% buttermilk (it will look curdled when it's warm)
3/4 cup butter or stick margarine, melted and cooled
1/4 cup honey
3 teaspoons salt
1/2teaspoon baking soda
3/4 cup toasted wheat germ
9 to 10 cups all purpose flour

In a large mixing bowl (I use my Kitchen Aid), dissolve yeast in warm water. Add buttermilk, butter, honey, salt, baking soda, wheat germ and 4 cups flour; mix well. Gradually stir in enough remaining flour to make a soft dough. Turn onto a heavily floured surface; knead until smooth and elastic, about 6 to 8 minutes. Place in a greased bowl, turning once to grease top. Cover and let rise in a warm place until double, about 1 hour.

Punch dough down. turn onto a floured surface; divide into thirds. Divide each portion into thirds; shape each into a 12 inch rope. Braid three ropes; pinch ends to seal and tuck under. Place in a greased 9 x 5 x 3 inch loaf pan. Repeat with remaining dough.

Cover and let rise until doubled, about 45 minutes. Bake at 350 degrees for 40 to 45 minutes or until golden brown. Remove from pan onto wire racks. Makes 3 loaves.


Monday, August 4, 2008

Homestead Biscuits

Biscuits are a staple around here. I make them a lot. Nearly every weekend I'll make Mike's favorite breakfast of biscuits, gravy, bacon and eggs. I also make biscuits with supper sometimes. They are great with fried chicken or chicken fried steak. Have you ever had biscuits and chocolate gravy? That's a good breakfast too. This is one of my favorite biscuit recipes. It's just as easy as the kind you make from a mix.

Homestead Biscuits
2 cups self-rising flour
3 tablespoons shortening
1 cup milk

First, preheat your oven to 450 degrees, then measure your flour into a bowl.
Photobucket
Add your shortening.
Photobucket
I use one of these nifty little gadgets to cut in the shortening, but you can also use a fork or two knives.
Photobucket
Add your milk and stir just until a slightly sticky dough forms.
Photobucket
Knead lightly on a floured surface. I just fold it over and pat it a few times. It's a good idea to remove your rings when you do this. I always forget and have to take them off later and scrub them with an old toothbrush to get the dough out.
Photobucket
Roll to about a half inch thickness. This is such a cute rolling pin with red handles. I bought it at an estate sale. An elderly lady took my payment and told me that she hoped I would roll out many biscuits for my family with it. I have, and I think about her every time I use it.
Photobucket
Cut dough and place on a lightly greased baking sheet.
Photobucket
You can also put them all in your cast iron skillet if it isn't already in use frying bacon. :) Bake at 450 for 10 to 12 minutes. Mike likes them just lightly brown.
Photobucket
Enjoy!

Saturday, May 3, 2008

Challah


I normally don't post recipes two days in a row, but I just couldn't help myself. :) This recipe is for challah, a traditional Jewish bread. It calls for margarine or vegetable shortening to keep it kosher, but you could use butter. It is customary in Jewish homes to begin the three meals eaten during Shabbat with blessings over two loaves of challah. It is a very pretty bread and so much fun to make. This recipe makes one loaf.


1. Stir together 2 cups of flour and 1 Tablespoon yeast in a mixing bowl (or in my case, the bowl of my Kitchenaid) and set aside. In a medium saucepan, heat and stir together 1 1/4 cups of water, 3 tablespoons of sugar, 3 Tablespoons of margarine, and 1/2 teaspoon of salt just until warm (120 to 130 degrees) and margarine almost melts.


2. Add water mixture and two beaten eggs to dry mixture.

Beat on low to medium speed for 30 seconds, then on high for 2 to 3 minutes.

3. Stir in an additional 2 3/4 to 3 1/4 cups of flour and knead using dough hook. You can, of course, also turn the bread out onto a floured surface and knead by hand until the dough is smooth and elastic. Shape into a ball and place in a lightly greased bowl, turning once to grease surface. Cover and let rise in a warm place until double in size (about an hour).


4. Punch dough down. Turn out onto a lightly floured surface. Divide dough into thirds. Cover and let rest for 10 minutes.


5. Shape each third into an 18 inch long rope. Braid ropes and place on lightly greased baking sheet. Cover and let rise in a warm place until nearly doubled (about 30 minutes). Preheat oven to 375 degrees. Brush top of braided loaf with a beaten egg white.


6. Bake for 25 to 30 minutes or until bread sounds hollow when tap it. If necessary cover loosely with foil for the last 10 minutes of baking to prevent over browning. Immediately remove bread from baking sheet. Cool on a wire rack.

Sunday, February 24, 2008

Afternoon Tea


I normally don't post on Sunday, but I just had to tell you about our fun afternoon yesterday! In honor of my friends in the UK, Lynn and Tina I decided that I needed to make scones. :) I baked "coffeehouse scones" and my girls and I got out our pretty teacups and sat around the table to have our teatime. It was such fun and the scones were delicious. They are definitely on my list to make again. I must confess that I drank coffee instead of tea though.


Recipe:

2 cups (280 grams) all purpose flour
1/4 cup (50 grams) granulated white sugar
1 teaspoon baking powder
1/4 teaspoon baking soda
1/4 teaspoon salt
1/2 cup (113 grams) (1 stick) unsalted butter, cold and cut into pieces
2/3 cup (160 ml) buttermilk
Egg mixture for brushing tops of scones:
1 large egg, lightly beaten
1 tablespoon milk

Preheat oven to 400 degrees F (200 degrees C) and place rack in middle of oven. Stack two baking sheets together and line the top baking sheet with parchment paper. (This prevents the bottoms of the scones from over browning during baking.)

In a large bowl, whisk together the flour, sugar, baking powder, baking soda and salt. Cut the butter into small pieces and blend into the flour mixture with a pastry blender or two knives. The mixture should look like coarse crumbs. Add the buttermilk to the flour mixture and stir just until the dough comes together. Do not over mix the dough.

Transfer to a lightly floured surface and knead dough gently four or five times and then pat, or roll, the dough into a circle that is about 7 inches (18 cm) round and about 11/2 inches (3.75 cm) thick. Cut this circle in half, then cut each half into 3 pie-shaped wedges (triangles). Place the scones on the baking sheet. Make an egg wash of one well-beaten egg mixed with 1 tablespoon milk and brush the tops of the scones with this mixture.

Bake for about 15 to 20 minutes or until golden brown and a toothpick inserted in the middle comes out clean. Remove from oven and then turn your broiler on high. Sift confectioners (powdered or icing) sugar heavily over the tops of the scones and place them under the broiler. Broil for just a few seconds, turning the pan as necessary, until the sugar has melted and turns golden brown. Make sure to watch the scones carefully as the sugar will burn very quickly. Transfer to a wire rack to cool.

Makes 6 scones.

Friday, February 22, 2008

Two Favorite Recipes

One of my favorite quick and easy lunches: Chickpea, cherry tomato, and feta salad
This recipe is for one serving.
1) Rinse and drain 1/4 cup canned chickpeas
2) In a bowl, combine the chickpeas with 1/2 cup quartered cherry tomatoes, 1/4 cup crumbled feta cheese, 1 Tablespoon fresh lemon juice, 2 teaspoons olive oil, 1 teaspoon dried oregano, 1/8 teaspoon salt, and a pinch of pepper.


Banana Bread (the kids like this one better than the "healthy" banana bread)

1/3 cup shortening
1/2 cup sugar
2 eggs
1 3/4 cups all-purpose flour
1 teaspoon baking powder
1/2 teaspoon baking soda
1/2 teaspoon salt
1 cup (2 medium) mashed ripe banana
(1/2 cup chopped nuts)

Cream together sugar and shortening. Add eggs and mix. Combine dry ingredients. Add dry ingredients and mashed banana to egg mixture and stir. Add nuts and stir.

Pour mixture into greased and floured 9x5x3 baking pan. Bake at 350 degrees for 40 to 45 minutes.


And don't forget to wash up afterward! :)

Thursday, February 7, 2008

Banana Bread


This banana bread is not only yummy, but nutritious too. The recipe is from one of my most loved cookbooks, The New Laurel's Kitchen. From the state of this particular page, it's obvious that I've made it many times over the years. :)

3 very ripe bananas (1 cup mashed)
juice of 1 lemon
1/3 cup oil or butter
1/2 cup brown sugar

1 1/2 cups whole wheat flour
1/2 tsp salt
1/2 tsp baking powder
1/2 tsp baking soda
1/2 cup wheat germ
(1 cup chopped dates)
(1 cup toasted nuts)

Preheat oven to 375 degrees.
Mash bananas and mix them with lemon juice until smooth. Cream butter or oil and sugar together and add the banana mixture, stirring well.

Sift together flour, salt, baking powder, and baking soda. Mix in wheat germ. Add to the banana mix and stire in dates and nuts if desired.

The dough will be very stiff. Turn it into a greased 4" x 8" loaf pan and bake for about 45 minutes. To test for doneness, insert a knife into the loaf: if it comes out clean, the bread is done.

Makes 1 loaf.
(You can also bake banana bread in an 8" x 8" pan, or make 12 muffins. Bake these for about 1/2 hour.)